Usually when an BMO e-Leave employee account is created, the leave approval authority is selected. However, if there are changes in your management team and you would like to change the approval authority, you can do so by logging into your administrator account and edit your employee’s account settings.
Below is a guide on how to change BMO e-Leave Employee Account Leave Approval Settings.
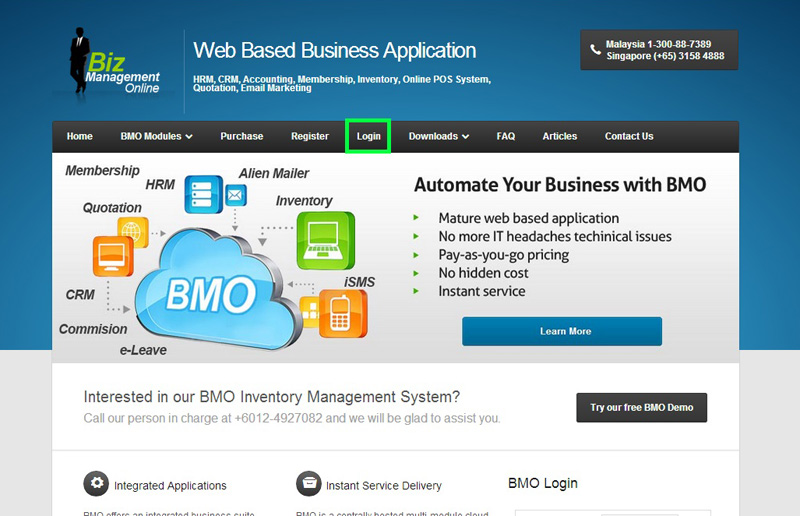
1. Go to BMO home page and click “Login”.
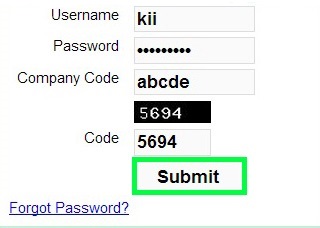
2. Login to your administrator BMO account.
3. In your BMO administrator account page, go to Employee > Employee List to setup E-Leave approval.
[imageframe lightbox=”yes” style=”border” bordercolor=”#e6e6e6″ bordersize=”5″ stylecolor=”” align=”” animation_type=”fade” animation_direction=”left” animation_speed=””]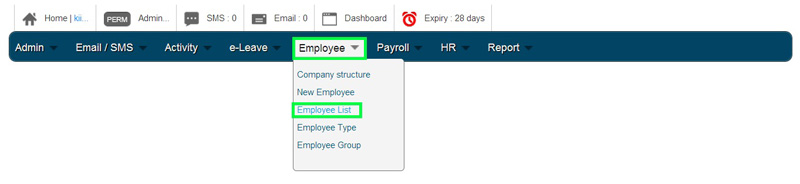 [/imageframe]
4. Select the employee name and click Action>Edit to change the employee’s details.
[imageframe lightbox=”yes” style=”border” bordercolor=”#e6e6e6″ bordersize=”5″ stylecolor=”” align=”” animation_type=”fade” animation_direction=”left” animation_speed=””]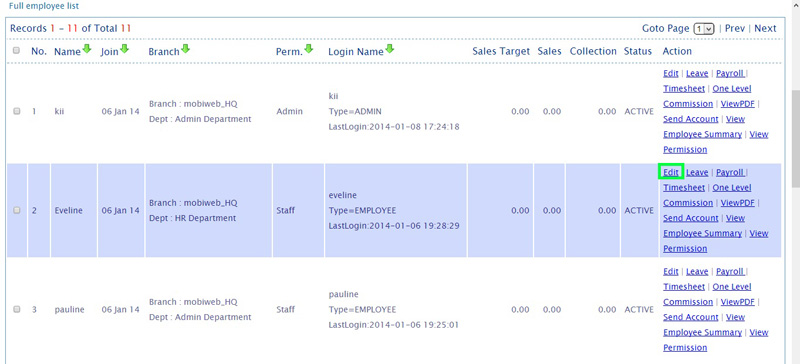 [/imageframe]
5. Then, proceed to your employee’s “EMPLOYMENT” section, scroll down and select leave “Approval Type” for your employee.
[imageframe lightbox=”yes” style=”border” bordercolor=”#e6e6e6″ bordersize=”5″ stylecolor=”” align=”” animation_type=”fade” animation_direction=”left” animation_speed=””]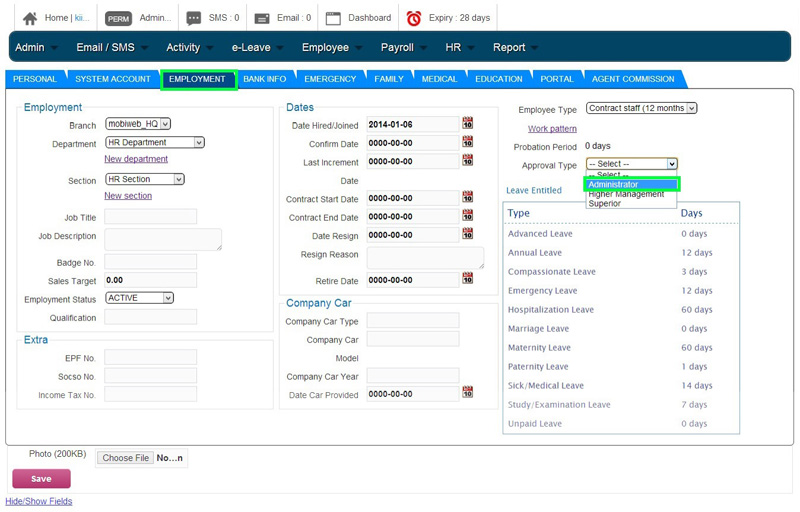 [/imageframe]
6. The system will then show you different level of approvals in Approval policy table.
[imageframe lightbox=”yes” style=”border” bordercolor=”#e6e6e6″ bordersize=”5″ stylecolor=”” align=”” animation_type=”fade” animation_direction=”left” animation_speed=””]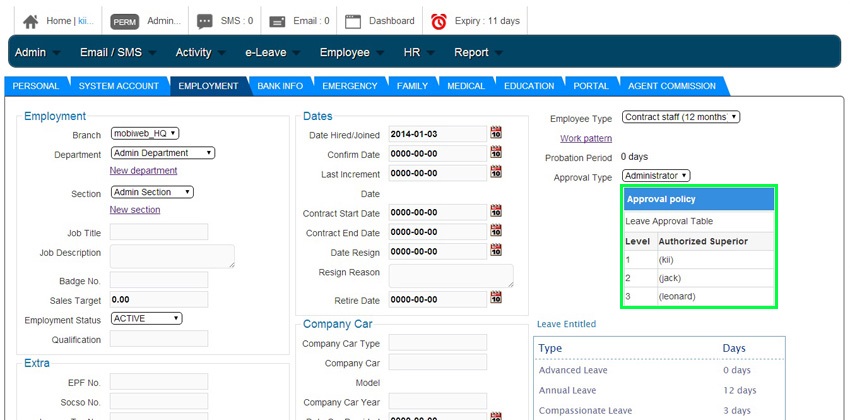 [/imageframe]
7. Click “Save” to save the approval setting.
[imageframe lightbox=”yes” style=”border” bordercolor=”#e6e6e6″ bordersize=”5″ stylecolor=”” align=”” animation_type=”fade” animation_direction=”left” animation_speed=””]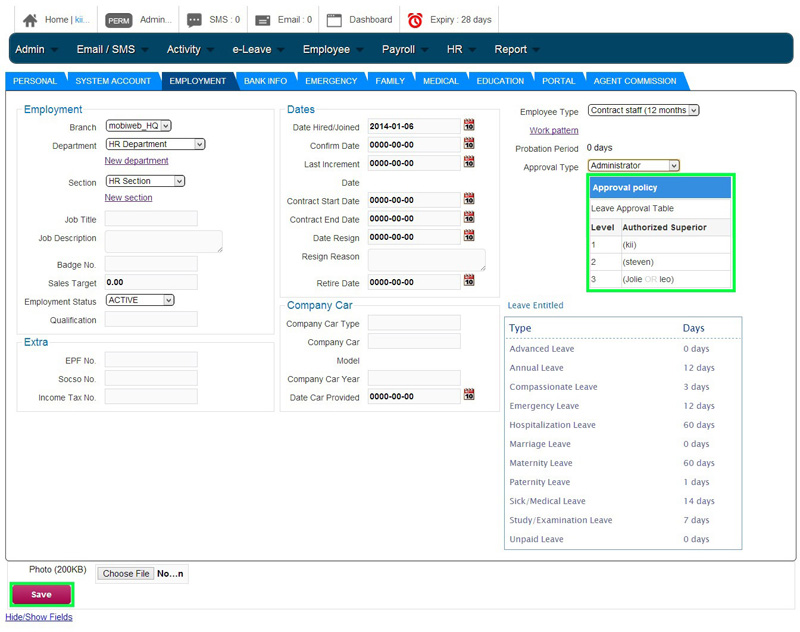 [/imageframe]
8. A message box will pop out and show that data updated for employee’s approval setting. Click “OK” to dismiss the message.
[imageframe lightbox=”yes” style=”border” bordercolor=”#e6e6e6″ bordersize=”5″ stylecolor=”” align=”” animation_type=”fade” animation_direction=”left” animation_speed=””]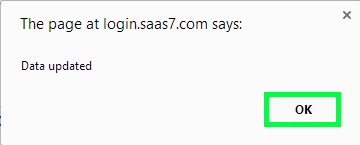 [/imageframe]