BMO e-Leave is capable of accommodating multi-level leave approval. If your company requires multiple leave approvers from different management levels, BMO Online Leave Management System can certainly do so.
After creating the new approval type, you will have more selection for Approval Type when creating new Employee Account.
In this guide, we will show you how to add the new approval type (New Approval Level) in BMO e-Leave.
1. Go to BMO home page and click “Login”.
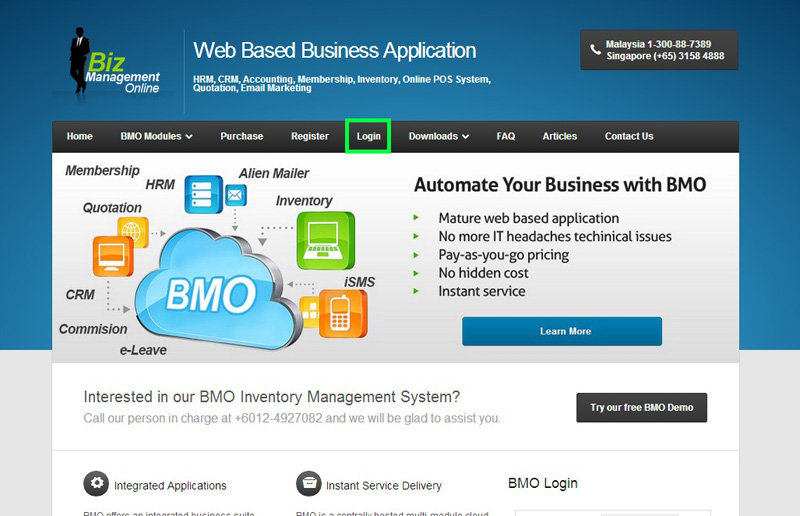
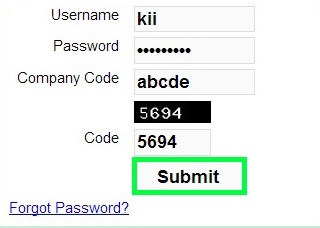
2. Login to your administrator BMO account.
3. In your BMO administrator account page, go to HR > Approval Setting > Approval Set to setup E-Leave approval.
[imageframe lightbox=”yes” style=”border” bordercolor=”#e6e6e6″ bordersize=”5″ stylecolor=”” align=”” animation_type=”fade” animation_direction=”left” animation_speed=””]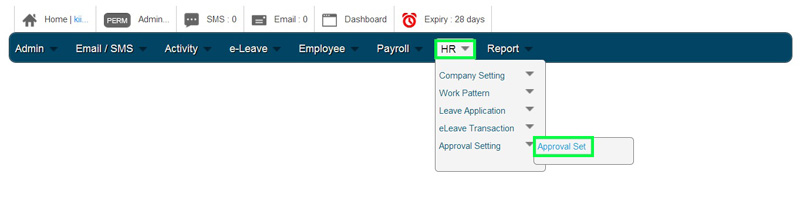 [/imageframe]
4. To create a new approval type, click on “New Approv.” box under menu bar.
[imageframe lightbox=”yes” style=”border” bordercolor=”#e6e6e6″ bordersize=”5″ stylecolor=”” align=”” animation_type=”fade” animation_direction=”left” animation_speed=””]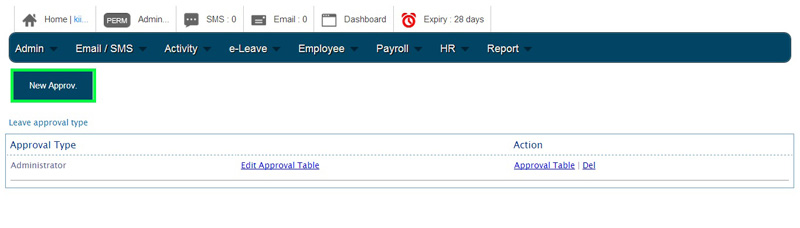 [/imageframe]
4. Insert a new approval type name in the “Type Name” column.
[imageframe lightbox=”yes” style=”border” bordercolor=”#e6e6e6″ bordersize=”5″ stylecolor=”” align=”” animation_type=”fade” animation_direction=”left” animation_speed=””]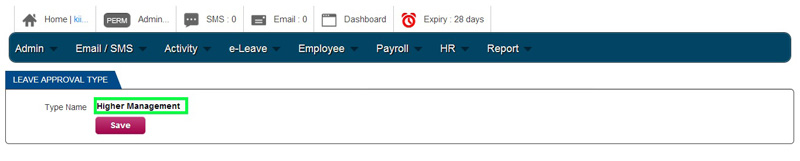 [/imageframe]
5. Click “Save” to apply the new approval type.
[imageframe lightbox=”yes” style=”border” bordercolor=”#e6e6e6″ bordersize=”5″ stylecolor=”” align=”” animation_type=”fade” animation_direction=”left” animation_speed=””]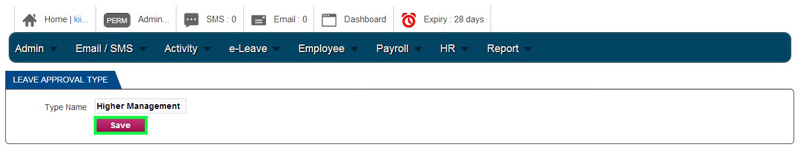 [/imageframe]
6. A message box will pop up and show that you have successfully added leave approval type. Click “OK” to dismiss the message.
[imageframe lightbox=”yes” style=”border” bordercolor=”#e6e6e6″ bordersize=”5″ stylecolor=”” align=”” animation_type=”fade” animation_direction=”left” animation_speed=””]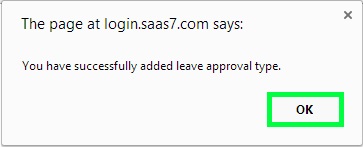 [/imageframe]
7. A new approval type had been successfully created. You can click on “Edit Approval Table” to change approval superior info or click “Del” to delete the approval type that you have created.
[imageframe lightbox=”yes” style=”border” bordercolor=”#e6e6e6″ bordersize=”5″ stylecolor=”” align=”” animation_type=”fade” animation_direction=”left” animation_speed=””]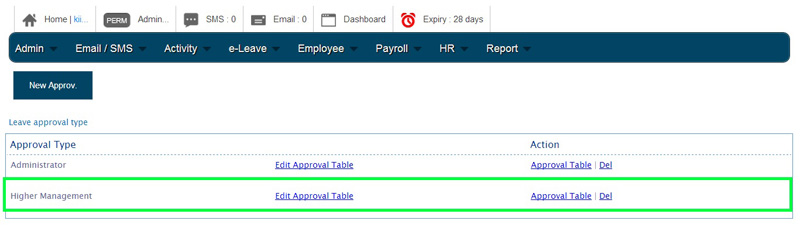 [/imageframe]